
In this article:
- Introduction
- Connecting your course to Poll Everywhere
- Course management
- Creating Assignments
- Managing Multiple Assignments and Activities
- Grade Synchronization
- Viewing Grades
- Deleting Synced LMS Assignments in Poll Everywhere
- Optional Course Start and End Dates Pickers
Introduction
Instructors can import their course rosters from their school’s Brightspace LMS into Poll Everywhere. This automatically registers each student as a Poll Everywhere participant. Registering students with Poll Everywhere allows educators to easily identify how students responded to their activities and export Poll Everywhere gradebook reports as grade columns within Brightspace.
Connecting your course to Poll Everywhere
Note: Course Admin access may be restricted at your institution
The steps above (Course Admin → External Learning Tools → LTI Advantage → New Link) require Course Admin access, which some institutions limit to system administrators only.
If you don't see Course Admin in your course menu:
- Contact your Brightspace administrator and ask them to create the Poll Everywhere LTI Advantage link on your behalf — you can then follow from Step 7 onward (Add Existing Activities).
- Alternatively, go to Content → Existing Activities → External Learning Tools → Create New LTI Link, select Poll Everywhere, then edit the activity to set "Open in a new tab" before launching.
This alternate path is not supported on Brightspace Project Sites.
Using the Classic Flow
-
In Brightspace, navigate to the course you’d like to add the Poll Everywhere link.
-
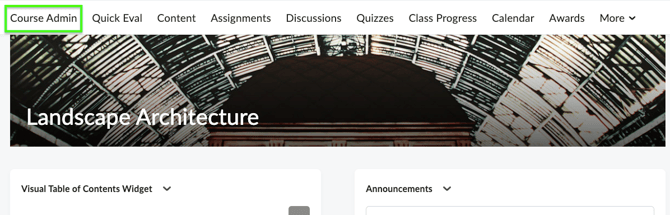
Click Course Admin in the course menu.
New Content Experience
-
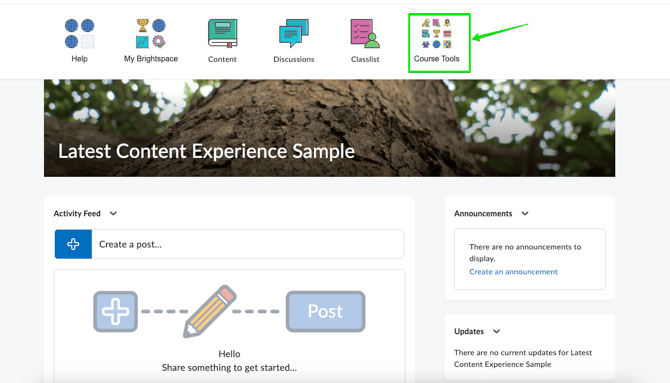
From the Brightspace New Content Experience, click Course Tools.
-
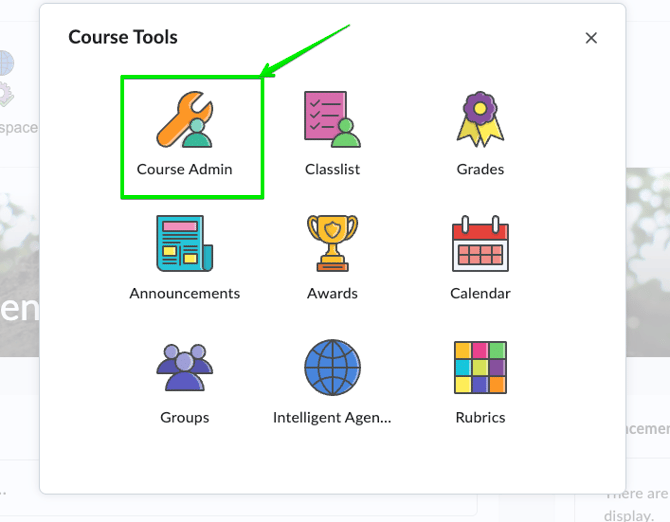
In the new window, select Course Admin.
Continue Setup (Both Flows):
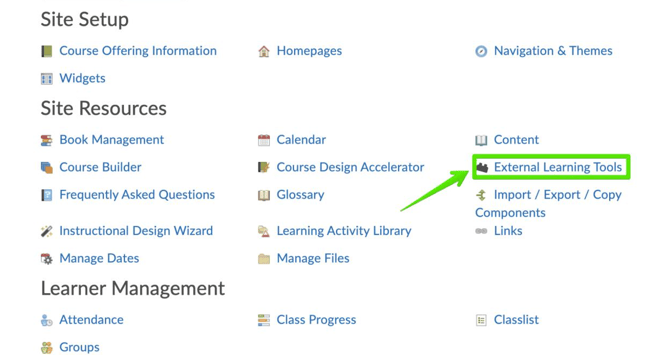
Step 1: Click External Learning Tools.
Step 2: Under the LTI Advantage tab, click New Link.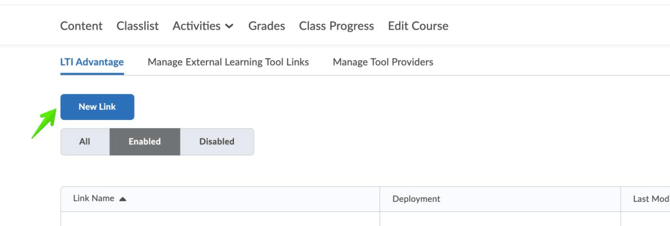
Step 3: Fill out the form with the following values:
a. Deployment: Select the tool deployment previously created by a Brightspace Administrator.
b. Name: Poll Everywhere
c. Description: Any value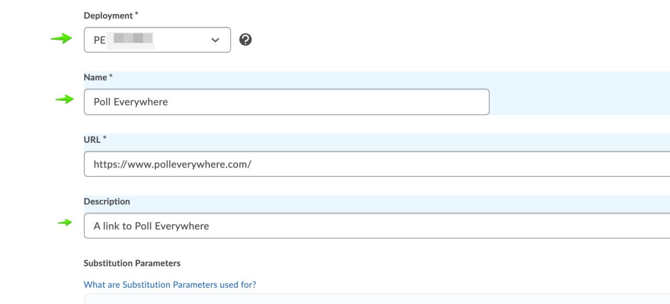
Step 4: Click Save and Close to add the new LTI Advantage link.
Step 5: Click Content on the course menu.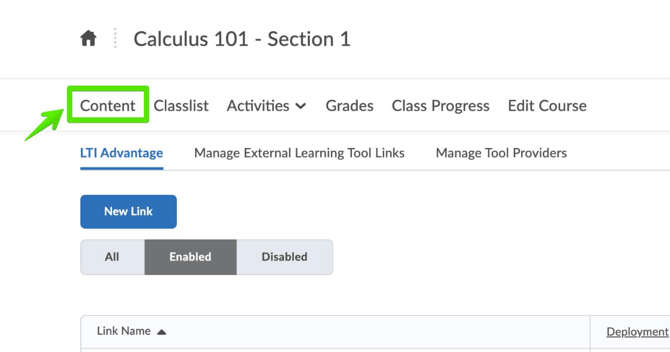
Step 6: Under Content, create a new hidden unit called Poll Everywhere and Save.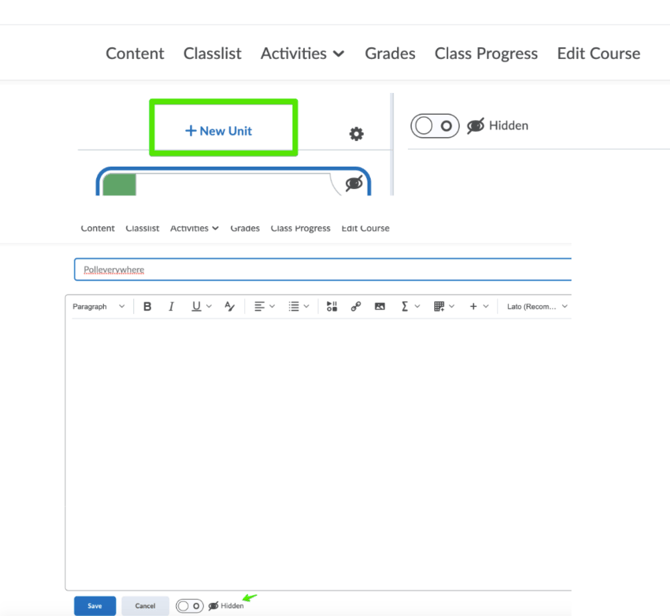
Step 7: Click Add Existing Activities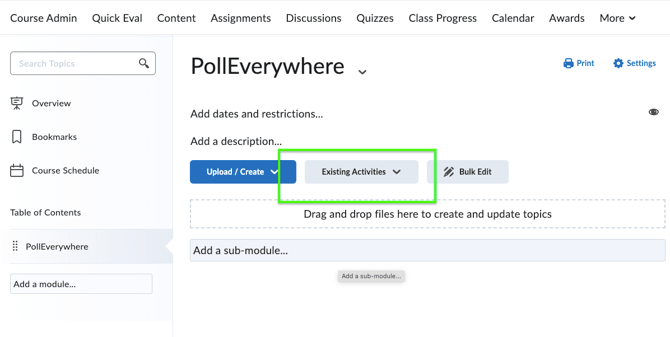
Step 8: Select External Tool Activity as the tool type.
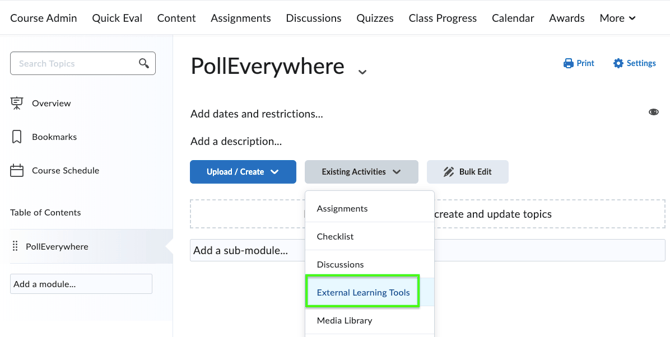
Step 9: In the popup, select Poll Everywhere.
Step 10: In the expanding menu, Edit the new tool.
Note: If you're using an older version of D2L, we recommend roll-clicking your mouse to open the LTI launch in a new tab. This ensures access to settings that may not be available in your current version.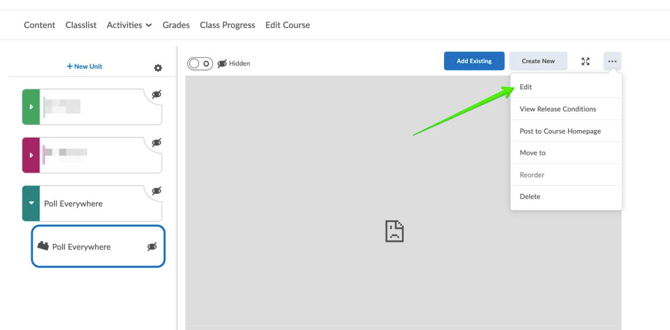
Step 11: Select Open in a new tab, and Save.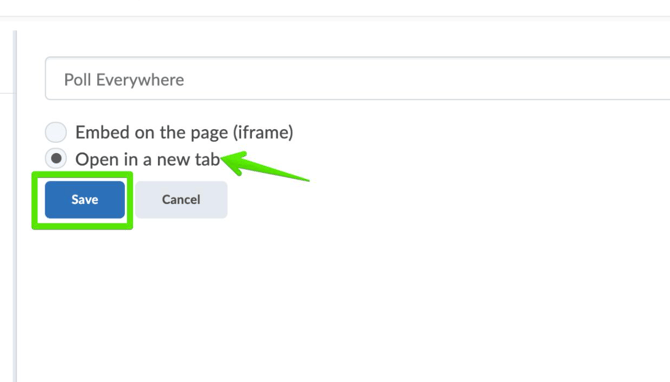
Step 12: Now, click the Poll Everywhere tool to open the Poll Everywhere in a new tab. You will first see a screen to confirm you wish to make the LMS connection. Click though that screen, and you will land on the LMS course connection page. Select Sync Roster.
Note: The following screen will inform you that that roster sync is happening in the background. You can click the button to continue to the Participants page.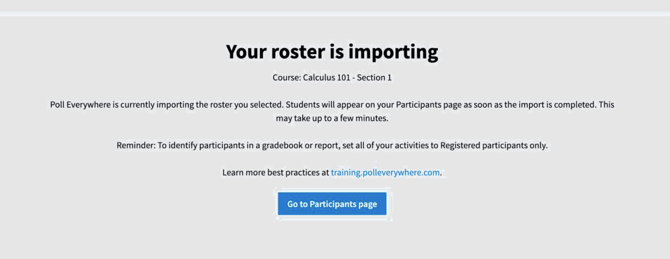
When this is done, a new Poll Everywhere profile will be created for each student who did not already have one. Students will automatically receive a notification email with a link to change their password. You can edit and manage the imported students at https://www.polleverywhere.com/participants.
You can now remove Poll Everywhere as an External Tool from your Brightspace course, or you can continue to use the Poll Everywhere link in Brightspace to perform LTI actions.
Course management
Course management streamlines course administration, simplifying class management for educators and administrators. This update enhances how professors integrate Poll Everywhere with their LMS.
Key Features:
- Scoring Assignments: Assignments can be scored based on correctness, participation, and attendance. These scores seamlessly sync with your LMS using both points-based and percentage-based models.
Accessing Courses
Helpful tip: Ensure your LMS is set up and integrated with Poll Everywhere to see the Course Management icon. A new navigation icon will appear on the left for users with LTI courses integrated. If a course isn't connected, the icon will appear once the integration is complete.
Step 1: Log in to your account at www.polleverywhere.com
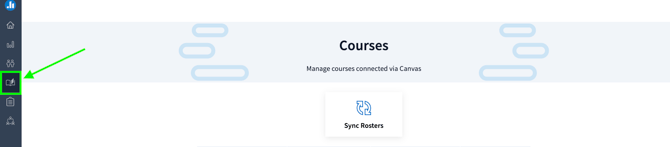
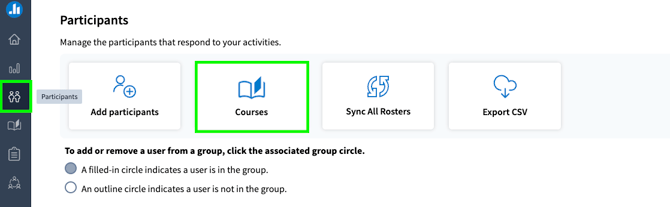
Step 2: Click on the Course Management icon. You can find two ways to access Course Management below:
a) Click on the course icon on the navigation bar shown on the left.
b) Click on the Participants icon on the navigation bar shown on the left, then select Courses.
Creating Assignments
Step 1: Empty State Screen: Select a course, an empty state screen appears if no assignments have been created, and an arrow will prompt you to click the Add New Assignment card.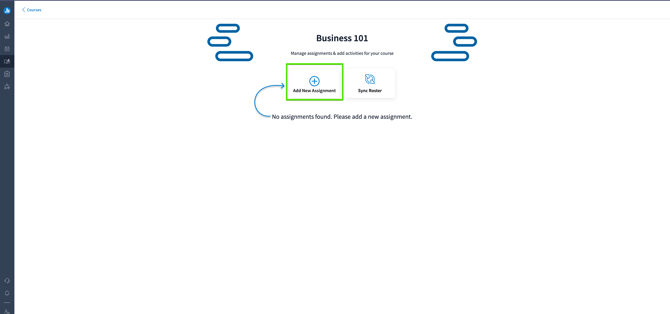
Step 2: Add New Assignment: Clicking the icon opens a flyout window called an "Action Sheet" for activating participation and correctness. Enter the assignment name and configure the participation and/or the correctness requirements.
Note: You can't save until you enter the "Assignment Name." However, you can save the assignment name without activating participation or correctness. Instructors can configure grading settings after selecting activities to include in an assignment. You can choose either or both grading types:
- Participation: Points for attempting activities
- Correctness: Points for answering correctly
To configure grading settings before syncing grades. There are two types of grading criteria: Participation and Correctness. You can select either or both.
Learn more about Participation and Correctness Grading Options here: Understanding Participation and Correctness Grading Options
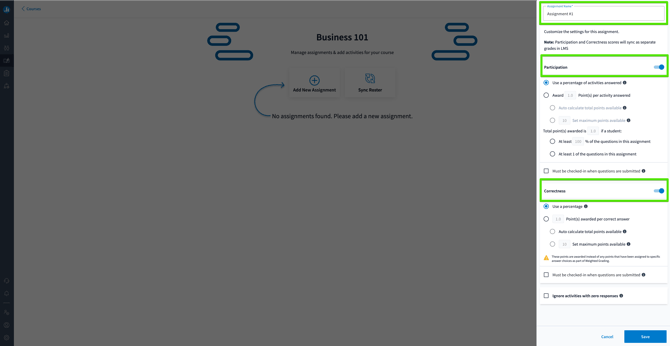
Step 3: Save Assignment: After selecting settings, click Save to add the new assignment. The new assignment will appear within a new column. Initially, "sync grades" is inactive until activities are added.
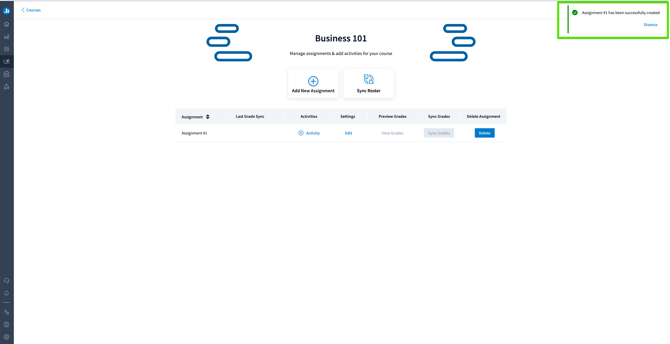
Step 4: Adding Activities
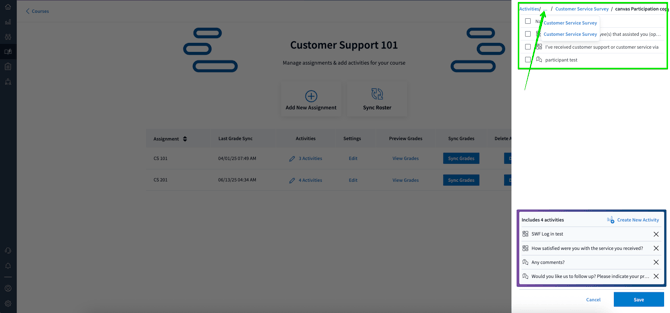
a) If activities have been created, click Add Activity to open the updated flyout, and all activities will now be displayed in a single window.
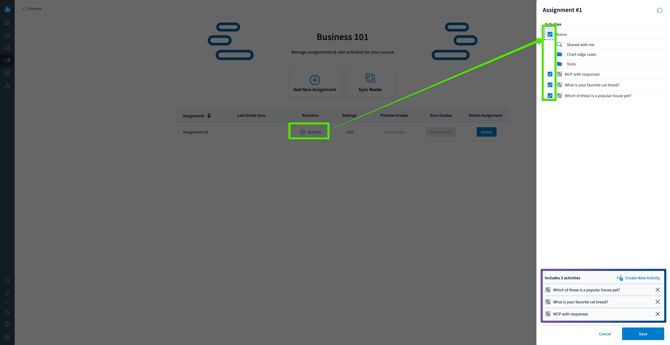
- You can select all activities in the visible list by toggling on the activity flyout window box and selecting all. This will only apply to the activities shown on the screen, not the entire folder.
b) If no activities are created or you need to "Create a New Activity", the new activity button is more visible with a plus icon, making it easier to locate for creating new activities.
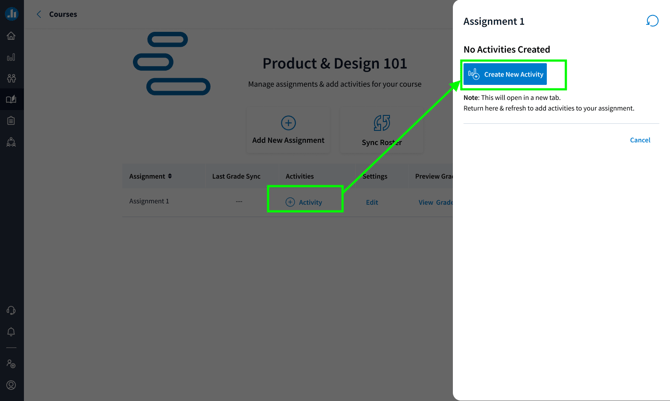
- You can also click the + (plus icon) at the bottom of the assignment fly-out to create a new activity.
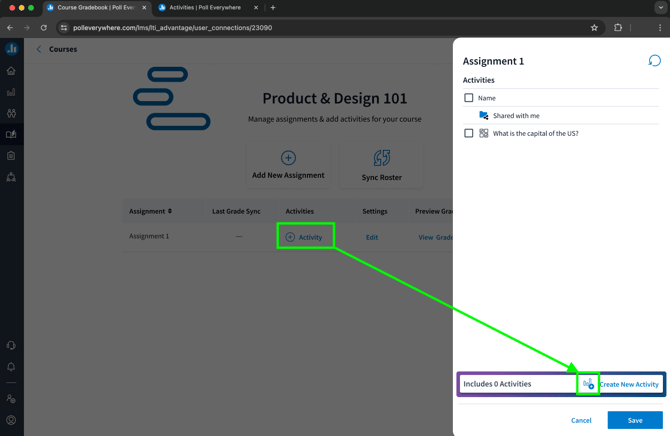
- Follow the activity creation flow
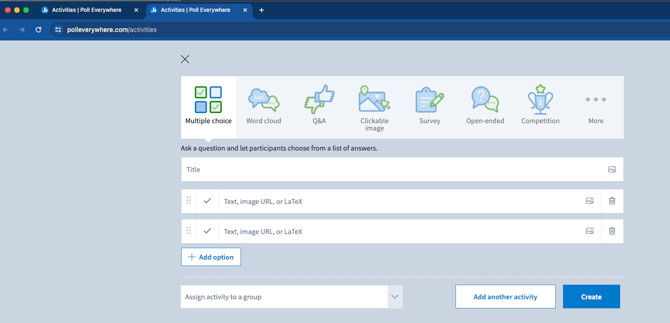
c) Refresh Activity List: If you create new activities, "hit the refresh button". to update the activity list instantly. Newly added activities will appear after refreshing.
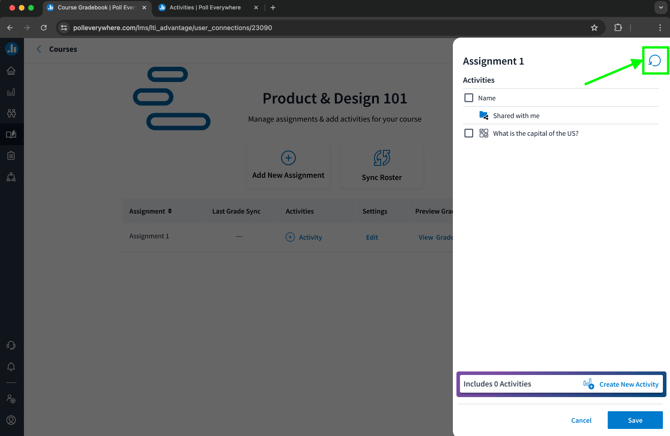
- The activities are displayed in the assignment. Click on an activity to view its summary. You can add or remove activities and make changes to the assignment.
Managing Multiple Assignments and Activities
a) Manage multiple assignments and activities in a populated state.
Helpful tip: When navigating through nested folders, breadcrumbs will appear at the top of the screen, allowing you to easily backtrack to previous folder levels. If there are multiple subfolders, the breadcrumbs will display them for quick navigation. If subfolders exist, a drop-down appears to help navigate through multiple layers of activities.
Example: You create subfolders (e.g., Course PM 2, within Course PM 3), and as you navigate through them, breadcrumbs will change to reflect your current position. The master Activities folder will always be visible for easy navigation.
- Edit an activity by following the same process flow used during the activity creation.
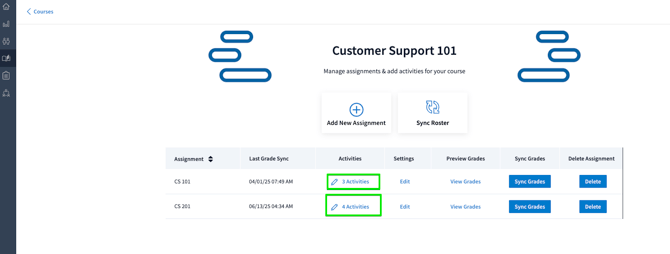
- The interface includes a folder breakdown showing all activities and assignments.
Grade Synchronization
Grade sync activates once activities are added to an assignment. Click Sync Grades to start the synchronization process, similar to roster sync.
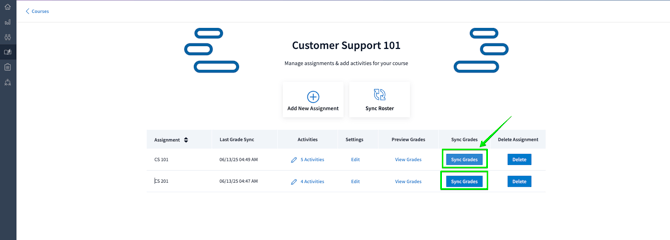
Helpful tip: "Sync Grades" becomes active when activities are in the assignment, and will only appear after grading options (participation and correctness) have been configured and saved. You can select either one or both, depending on your use case. Visit the Integration & Apps section to learn more about Sync Grade.
Viewing Grades
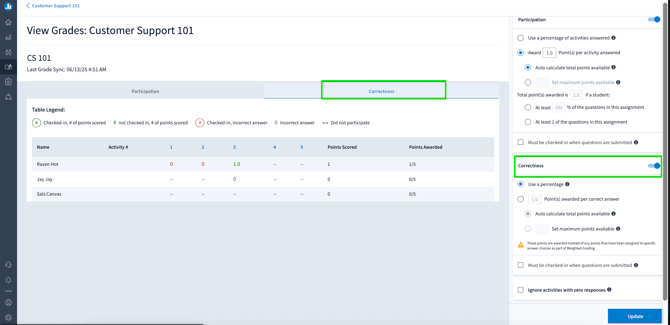
a) Click on "View Grades" for a specific group (e.g., Customer Support 101).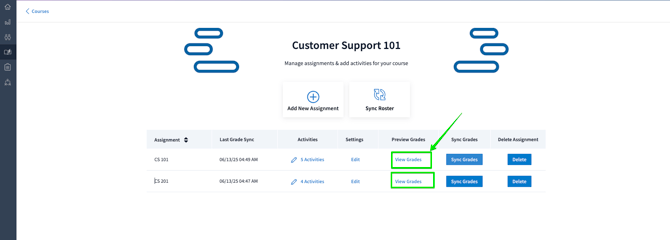
b) The new page displays participation and/or correctness settings configured earlier. Both tabs show the respective settings. A side tab, similar to a config panel, allows users to update settings.
- View grades for participation and configure Settings:
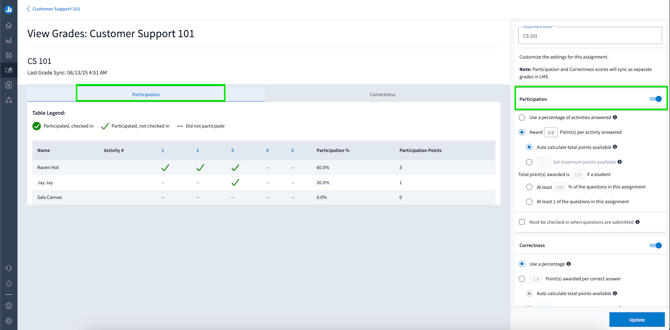
- View grades for correctness and configure Settings:
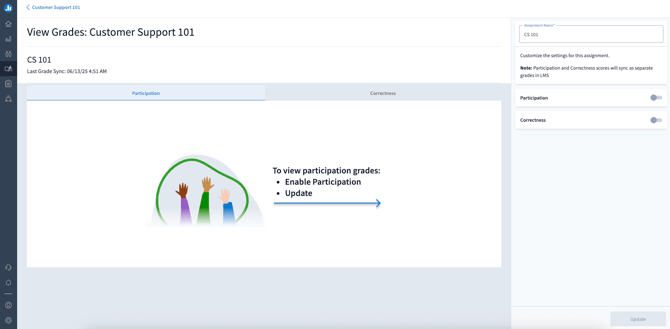
- If participation or Correctness is turned off, a notification with an image and text will inform the user that they need to activate participation and or correctness for the assignment.
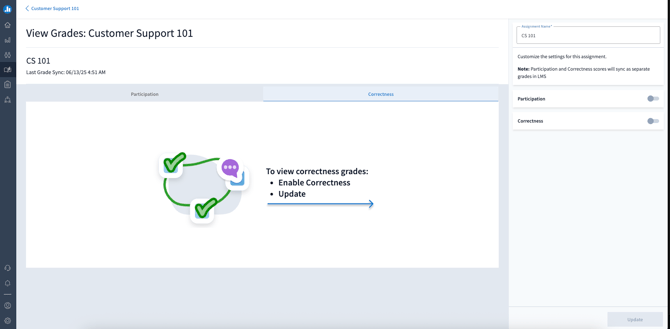
Note: If both Participation and Correctness are selected, we send two separate grade columns to your LMS (e.g., Canvas).
Deleting Synced LMS Assignments in Poll Everywhere
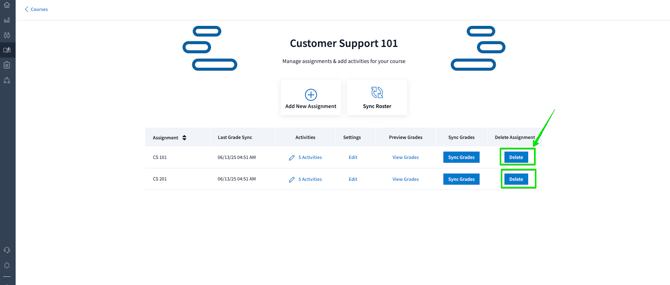
April 2025 Update- You can now delete LMS-synced assignments directly within Poll Everywhere, improving alignment between your LMS (e.g., Canvas) and Poll Everywhere when managing course assignments. This prevents confusion when assignments are removed from the LMS but still show in Poll Everywhere. To delete a synced assignment:
-
Navigate to your Course Management page.
-
Click on the desired course,
-
Locate the assignment and click the Delete button just under the Delete Assignment
-
A confirmation prompt will appear, informing you:
-
Deletion is permanent and cannot be undone.
-
This action does NOT affect the assignment in your LMS (e.g., Canvas).
-
-
Confirm deletion.
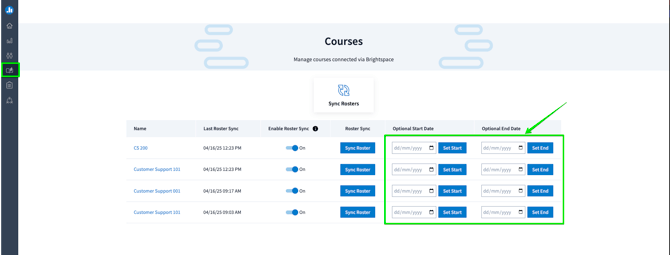
Optional Course Start and End Dates Pickers
April 2025 Update - To help manage response data across academic terms, you can now set optional course start and end dates. This filters LMS-synced assignment responses based on when they were submitted. This is ideal if you:
- Reuse polls or activities across semesters.
-
Want to ensure only current-term student responses are included in LMS grade sync.
-
Need a lightweight way to control when participation counts, without managing poll-level settings.
To set the optional course dates:
-
Go to your Course Management page.
-
Select the course you want to configure.
-
Optionally enter a Start Date, End Date, or both.
- Click Set Start and/or Set End to save changes.
To learn more, please click here: Getting Started with Course Management
If you have any questions or run into issues, please contact the Technical Support team