
Best practices for instructors
- Explain the attendance process clearly to students before the session. Test attendance setup before class to avoid confusion
- If location verification is required, give students a heads-up to enable GPS or connect to the appropriate Wi-Fi
In this article:
- How to enable attendance
- How to enable attendance for a question
- Starting an attendance session
- How students check in
- Best practices for instructors
- Troubleshooting attendance issues
With built-in attendance tracking, which helps instructors and institutions monitor student presence and participation during class sessions. This feature allows students to check in from their devices and creates automatic records of attendance, saving time and improving accuracy.
Attendance can also sync directly with your LMS, making it easier to manage grades and participation records over time.
How to enable attendance
To set up attendance for your question:
- Select the My settings icon (bottom left) and open Locations ("Locations are used for attendance tracking during your sessions. You can allow different locations for each session.").
- Select New location.
- Enter the location details (address, check-in radius and name) and save. Each location card shows its name and radius, for example 160 feet (~50 meters).
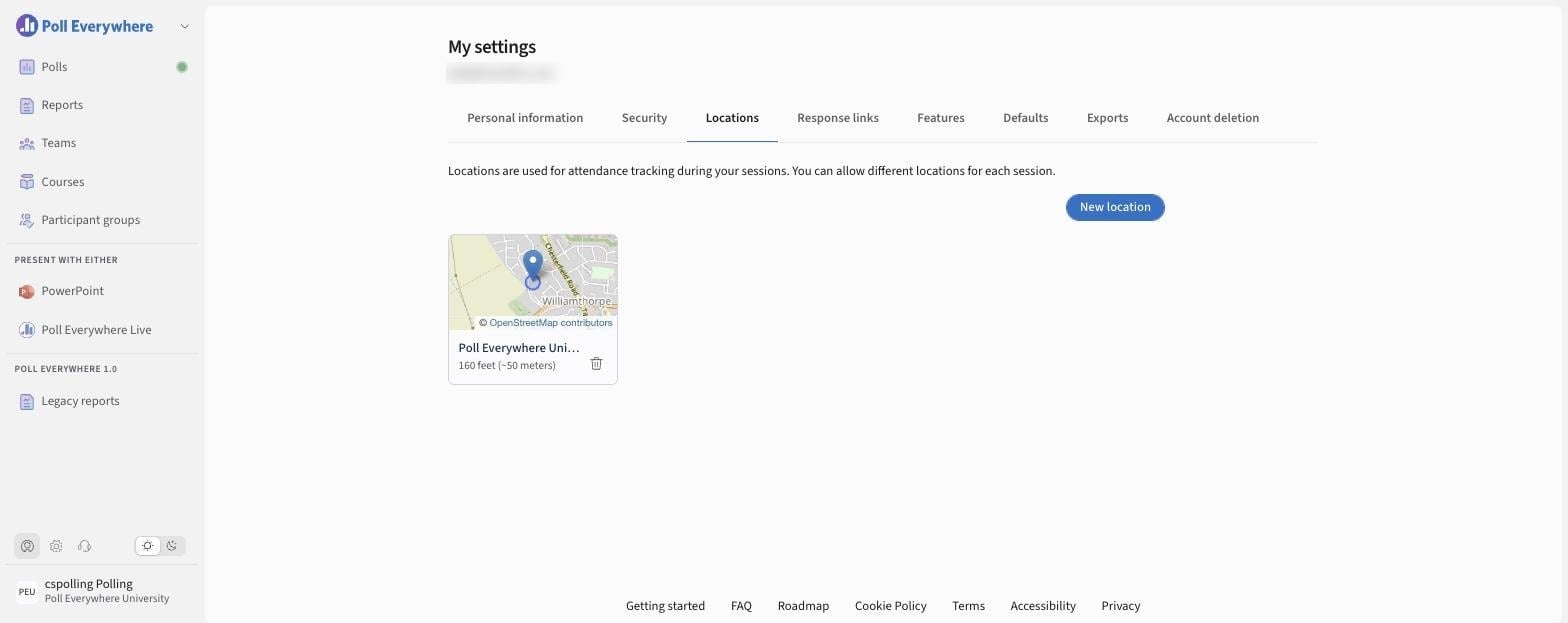
Tip: start with a generous radius and narrow it after testing. See Presenter Best Practices for Location-Based Attendance.
Attendance credit (for checking in, participating, or both) is set in your grading configuration: on the course Overview tab for LMS courses, or in a participant group's assignments.
How to enable attendance for a question
You can turn any question into an attendance check-in by updating its settings.
- In any poll, select Add in the slide pane and choose Attendance, or
- from Polls, open the Other tab and select Attendance.

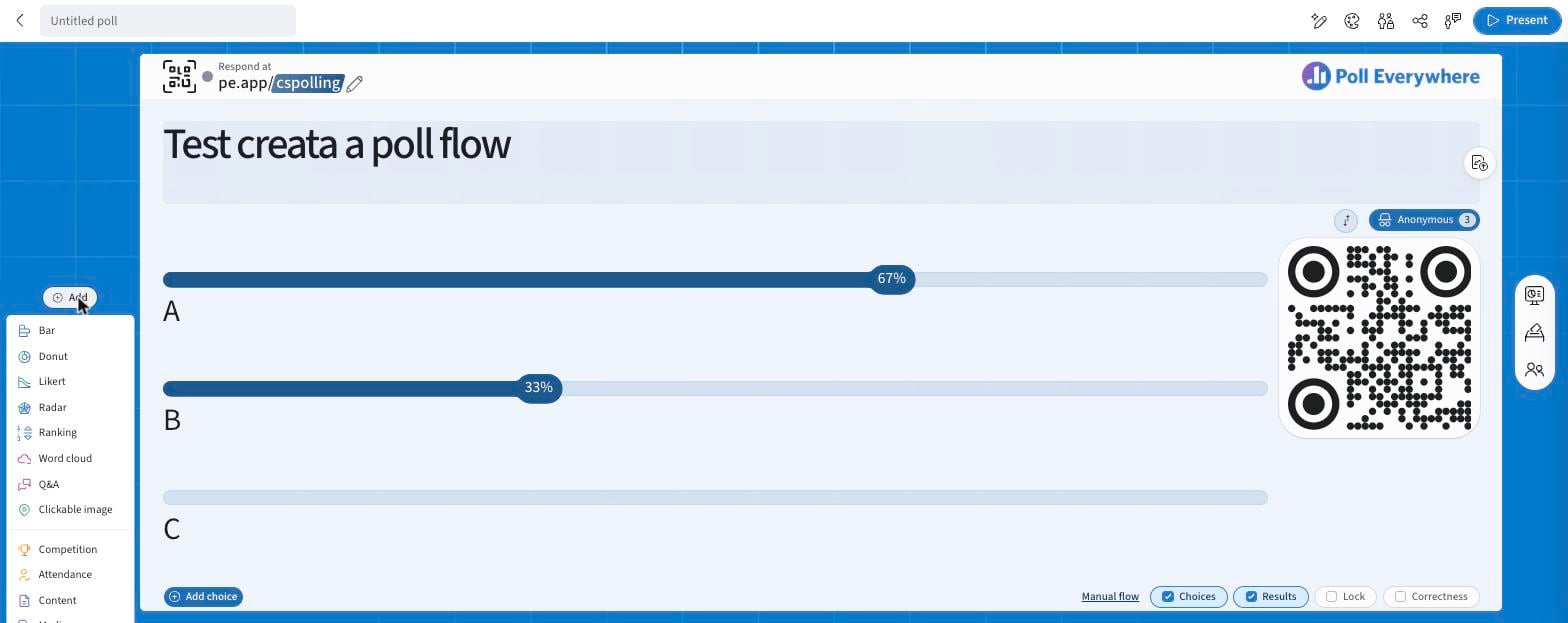
You can choose how long students have to check in (e.g., 5, 10, 15 minutes) and whether you want to require location-based verification.
Starting an attendance session
When presenting a question that has attendance enabled:
- Click the Present or Slideshow mode in PowerPoint
- The timer begins, and a check-in prompt appears on participant devices
Attendance ends when the timer runs out or when you select End next to the check-in code at the top of the presentation screen. If you end it by mistake, select Reopen. Reopening works until the original timer would have run out.
How students check in
Once a question has attendance enabled and is presented live:
- Students join the session using your join code
- A check-in button appears automatically
- They tap "Check-in"
- A confirmation message appears
- Students can continue to respond to the question as usual
If location verification is turned on, students will be prompted to share their location before check-in is accepted.
Troubleshooting attendance issues
If a student can’t check in:
- Ensure they’ve joined the presentation
- Confirm the attendance window is still open
- Verify their device’s location settings (if required)
If location isn’t working:
- Ask students to allow location access in their browser
- Increase the allowed radius for verification
- Allow manual approval for those unable to share a location
Can't see Attendance? Check My settings → Features → Attendance management. Your administrator may control it in Organization settings → Features.
If you're unsure how to use attendance or are experiencing issues, please contact support.