In this article:
This guide shows instructors how to use Poll Everywhere 2.0 inside a Canvas course with LTI 1.3 (LTI Advantage): launching the course dashboard, grading configurations, content, assignments and grade sync.
Before you begin
To use the Poll Everywhere LTI Advantage Canvas integration, it is recommended to first publish the course and add a start and end date for the course term. This guide also assumes that your IT administrator has already integrated Poll Everywhere as an App into Canvas through either modules or course navigation. Please confirm with your institution's documentation which integration path is supported.
1: Ensure the course is published using the button at the top right of the Course home screen.
2. Next, go to the course Settings and on the Course Details tab, make sure the course has a start date in the past, and an end date that is in the future from when you intend to use the integration.
Step 1: First-Time Use
The first time you launch Poll Everywhere from a Canvas course, approve permissions if prompted and link the course. Your course dashboard opens with six tabs: Content, Overview, Responses, Attendance, Assignments and Roster.
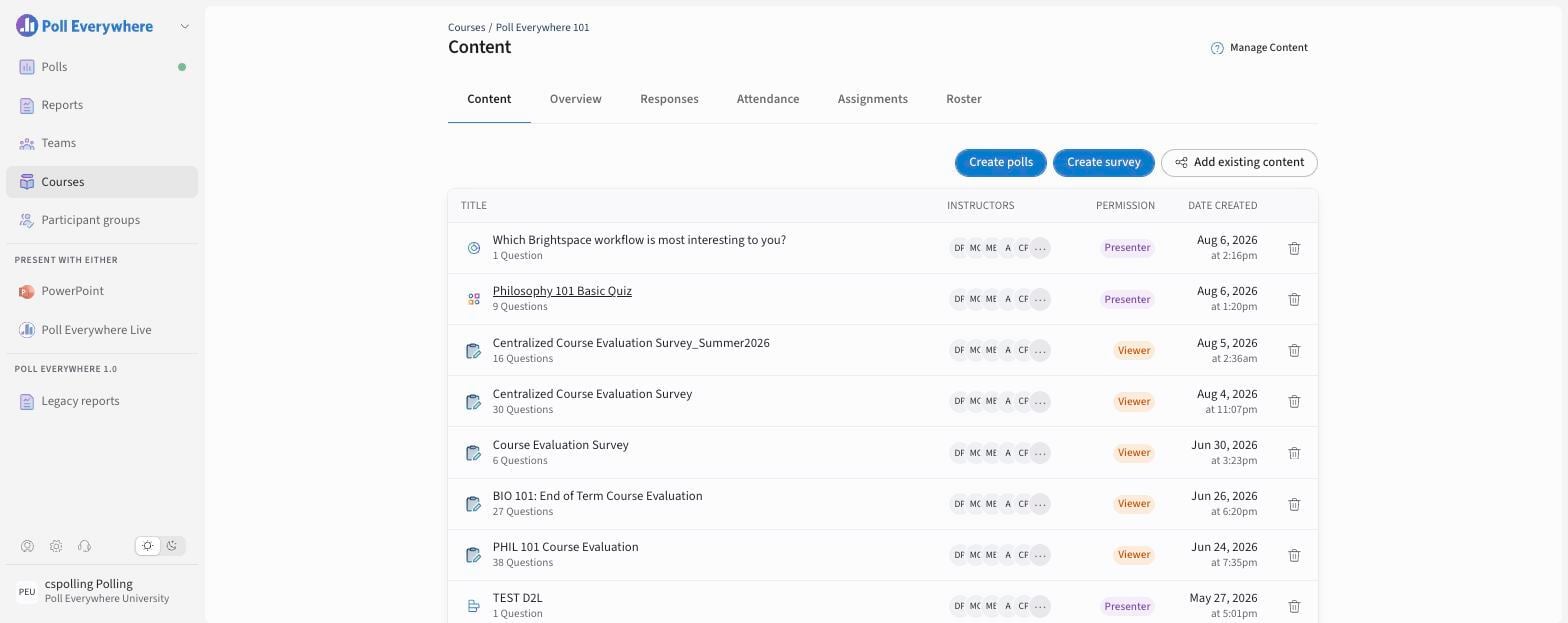
Note: Roster is automatically synced from Canvas. If multiple instructors launch Poll Everywhere, each will be recognized as an instructor in the system.
Launching Poll Everywhere from the Poll Everywhere 2.0 link in the course navigation syncs the roster automatically. Rosters also update every night with auto-sync. Students on the roster are added to your organization automatically as participants. No invitation email is sent, and they have nothing to accept. Students who already have a Poll Everywhere account are added at the next roster sync (when you launch from Canvas or at the nightly auto-sync). Everyone else is added the first time they sign in. You can check each student’s status in the Membership column on the Roster tab.
Important: Set your polls to restrict participation to students in your class. This makes sure responses are attributed correctly for grades, points and attendance.
Step 2: Viewing Course Data in Poll Everywhere
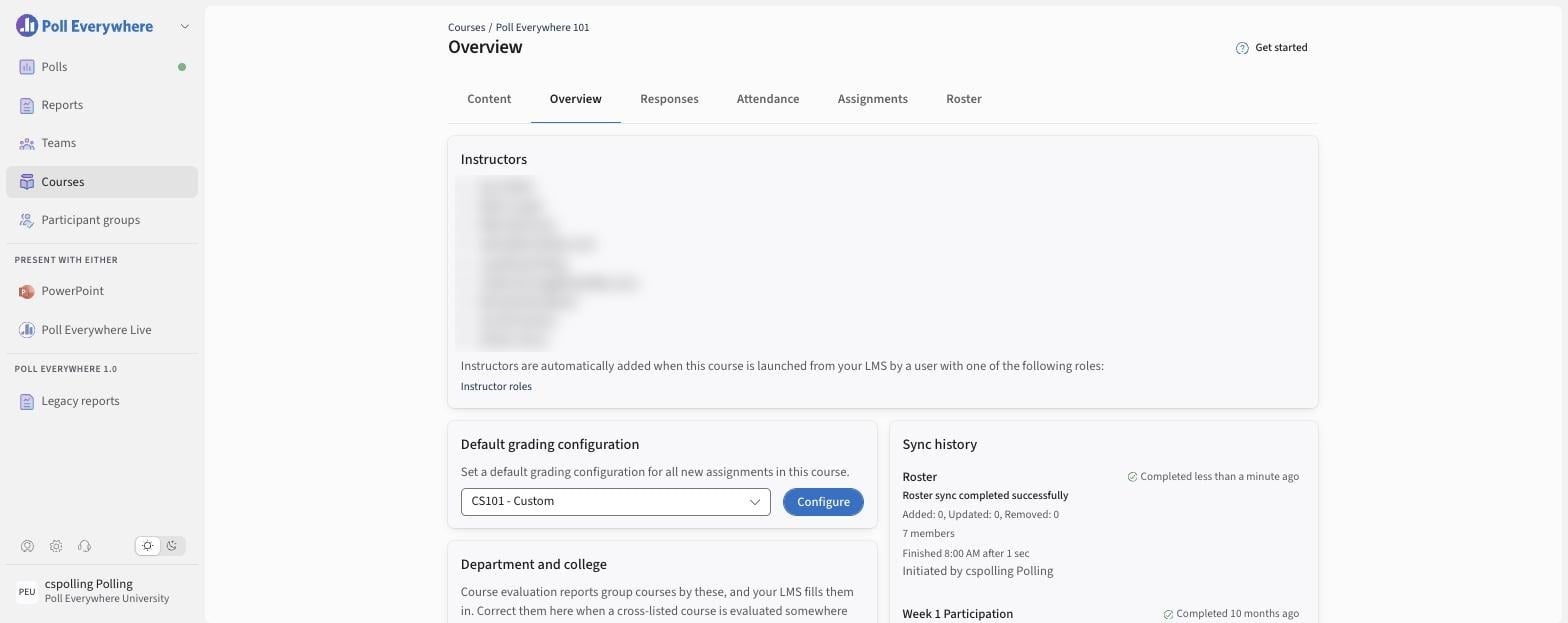
The Overview tab shows:
- the course Instructors
- the Default grading configuration (select Configure to create or edit rules)
- Department and college
- Sync history, with each roster and grade sync
Step 3: Grading Configurations
On the Overview tab, select Configure to create or customize grading rules. Examples include:
- Participation-based: e.g., answered ≥80% of questions = full credit.
- Correctness-based: points awarded based on correct answers.
- Attendance-based: credit given only when attendance is verified.
Note: You can combine these grading approaches for more flexibility.
To create a configuration, give it a descriptive name (for example, "Econ 101 Grading"), turn on the types of grading you want Poll Everywhere to track (Participation, Correctness and/or Attendance), then select Save. Saved configurations can be applied to assignments later.
Use Grade sync mode to choose how the grading types are sent to Canvas: as separate grades, or combined into one grade using a weighted average or a simple sum.
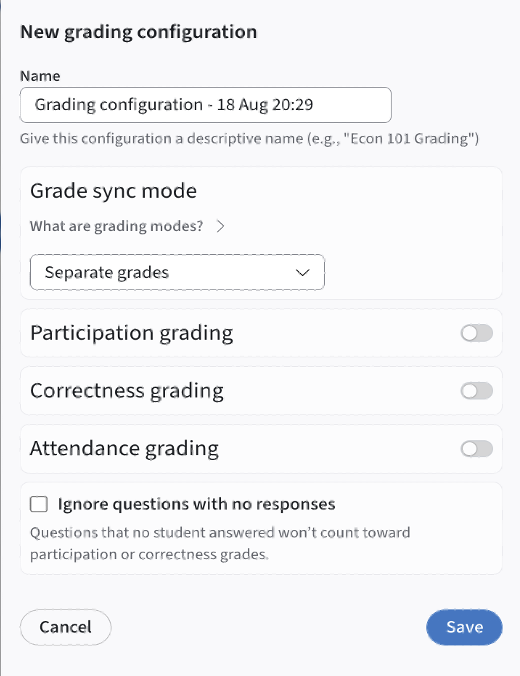
For more detail, see Syncing Rosters and Setting Grading Configurations.
Step 4: Polls & Sharing
On the Content tab:
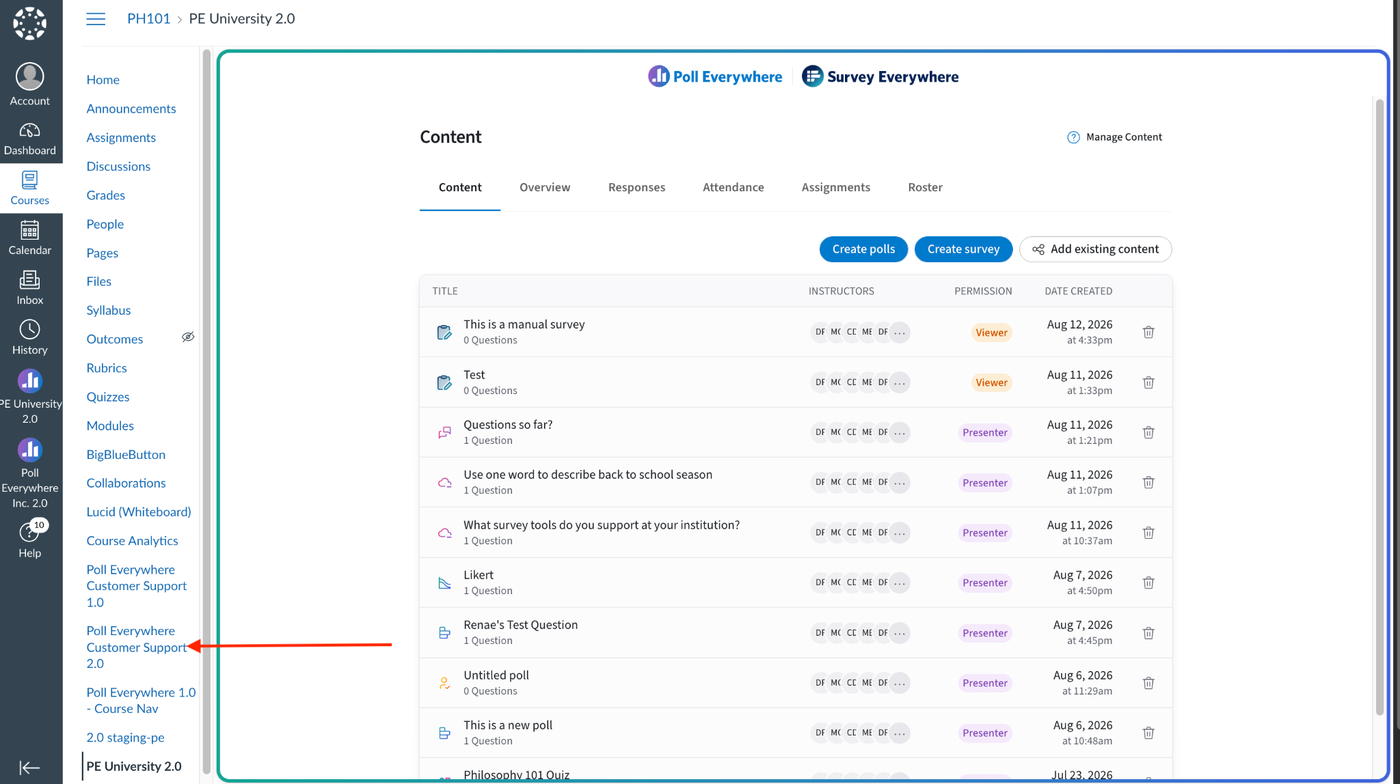
- Create polls: opens the full Poll Everywhere editor. Polls you create can be reused across courses; use folders to stay organized.
- Create survey: opens Survey Everywhere.
- Add existing content: links polls you already have.
Anything added to the course is shared automatically with its instructors. To share an individual poll or folder, open it and select Share → Presenters → Course.
The Content tab only shows Poll Everywhere content created for this course, so it may be blank the first time you open it, even if you already have polls elsewhere. Select Create polls to create content from within Canvas, or Add existing content to use folders and polls you created outside the Canvas integration.
Note: Poll Everywhere 2.0 introduces automatic course team sharing when launched from your LMS. Each LMS course now creates a background system team, allowing all content shared with that course to be automatically accessible by instructors and teaching staff.
Step 5: Responses and Assignments
- Responses Tab: Displays questions students answered week by week.
- A question will appear if ≥20% of the roster responded.
- You can generate assignments from these responses.
Step 6: Attendance Tab
This will automatically list attendance questions and results.
Instructors can manually verify attendance if automatic verification fails.
- On the Attendance page, you’ll see students flagged as “not verified.”
- Click on a student’s name (e.g., Elizabeth Brown) to review their submission reason and approve/reject attendance.
- Once approved, their participation score updates automatically.
Step 7. Creating Assignments
- Open the Assignments tab and select New assignment.
- Choose the polls or questions to include, and a grading configuration.
- Save the assignment.
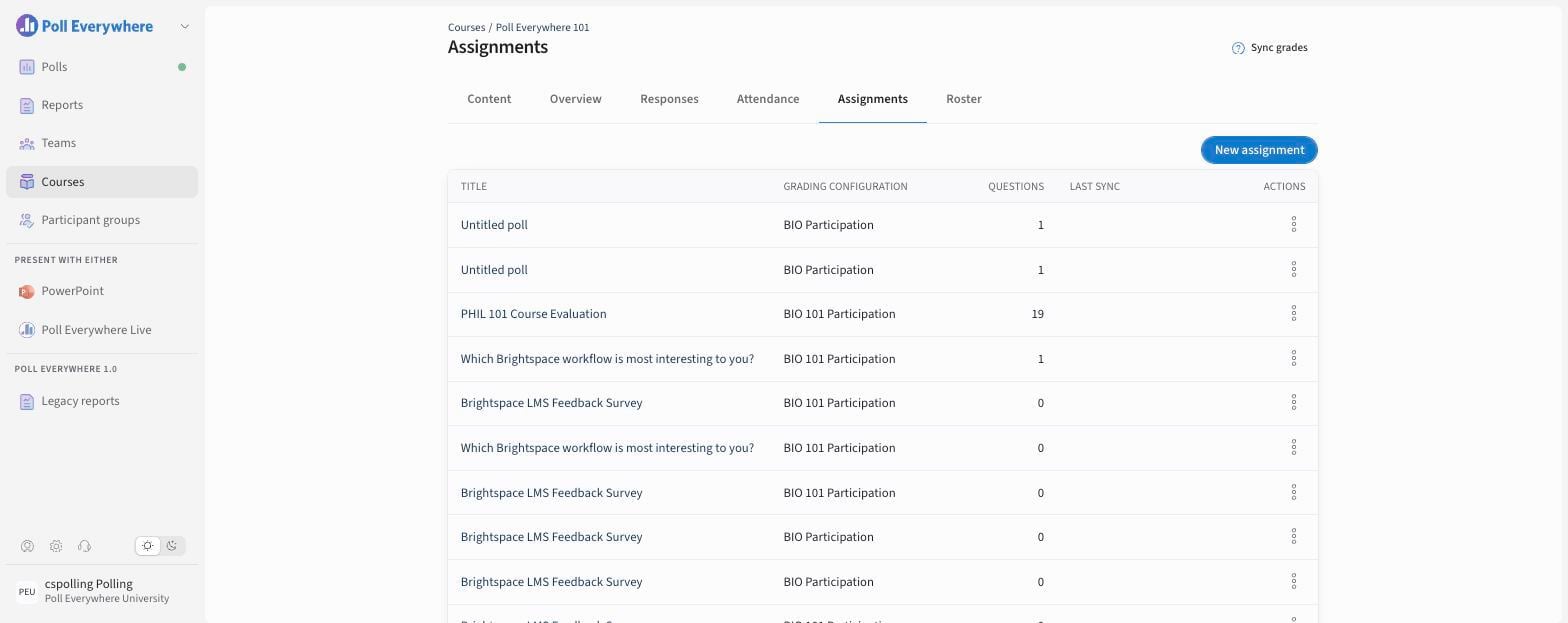
Creating the assignment in Poll Everywhere works best when you want to grade several Poll Everywhere activities you ran in a live class. Open the assignment to preview the calculated results. When you are ready, select Sync grades to create the matching item(s) in Canvas.
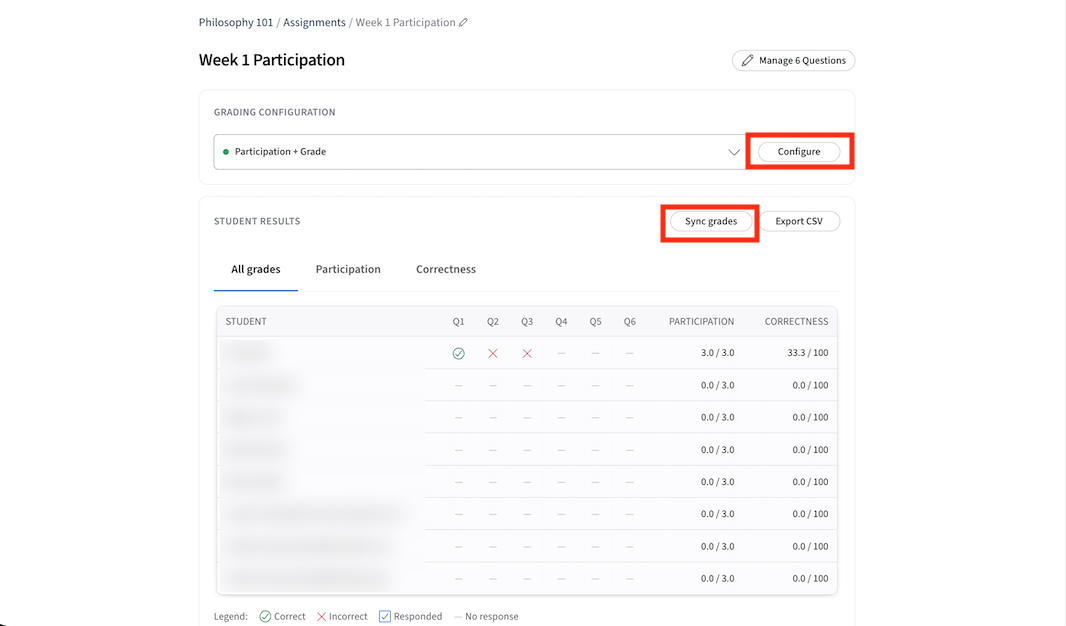
Step 8: Grading & Syncing Back to Canvas
- Once assignments are created and graded, select Sync grades on the Assignments tab. The Last sync column shows the latest push, and each sync is listed in Overview → Sync history.
- Grades appear in the Canvas Grades section as individual line items (e.g., Attendance, Participation, Correctness).
Step 9: Creating an Assignment in Canvas (External Tool)
Use this option for a single poll or a fully asynchronous quiz.
- In Canvas, create a new assignment.
- Under Submission Type, select External Tool and find the Poll Everywhere 2.0 link.
- Select the Poll Everywhere 2.0 content you want to link to the assignment.
- Save the assignment. Grades and points can be set to sync automatically when students complete it.
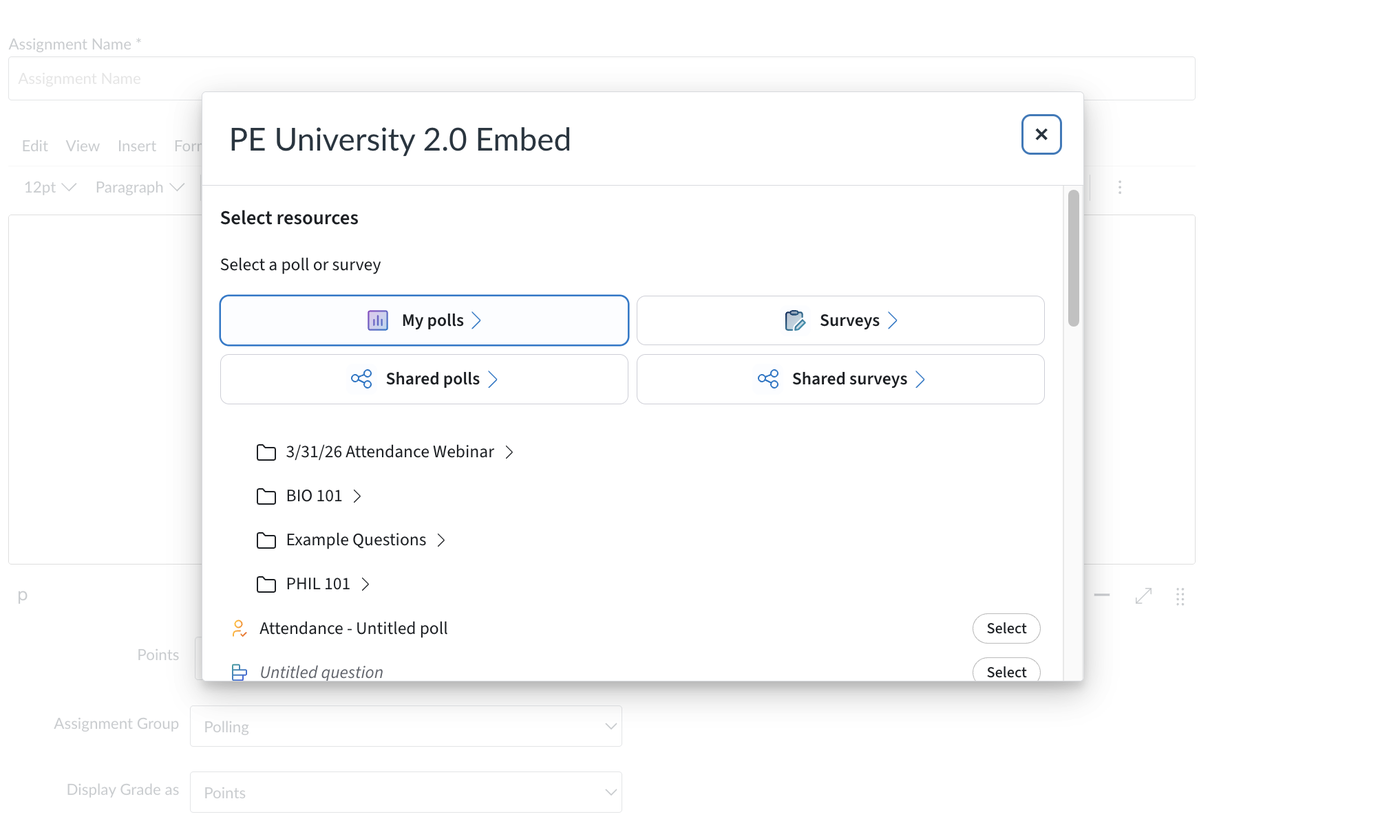
Step 10: Embedding Poll Everywhere Content with the Rich Content Editor
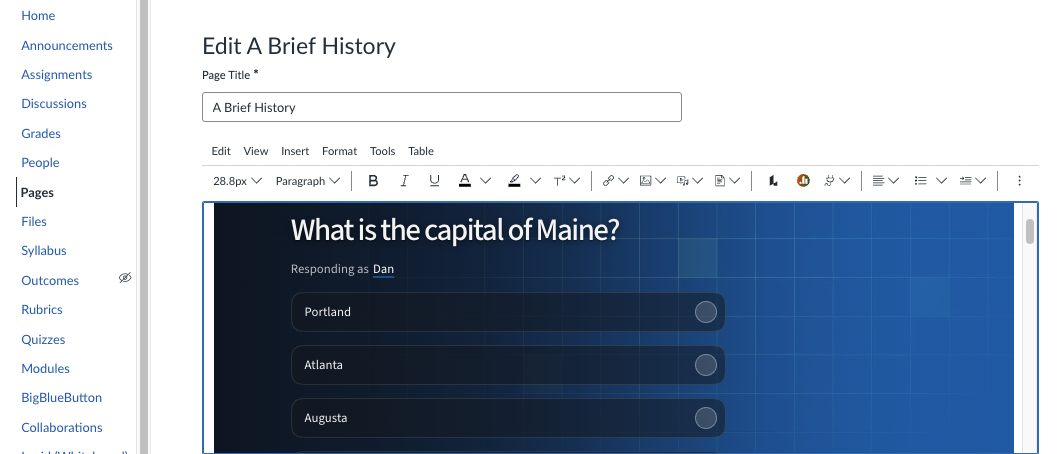
Use the Rich Content Editor button to add Poll Everywhere 2.0 content to a Canvas page, discussion or announcement. This is useful for icebreakers, discussion prompts, follow-up activities and online class engagement.
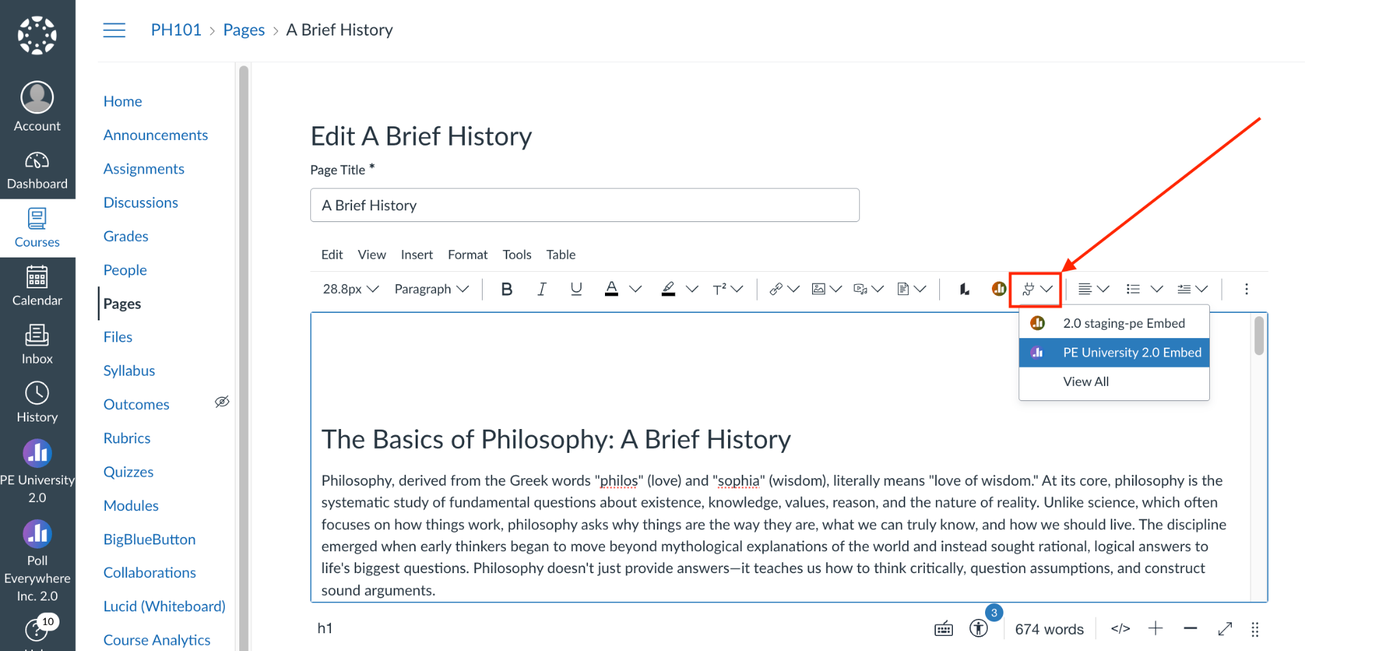
- Edit the page, discussion or announcement.
- In the editor toolbar, open the apps (plug) menu and select the Poll Everywhere 2.0 embed tool. Your administrator may have given it a custom name.
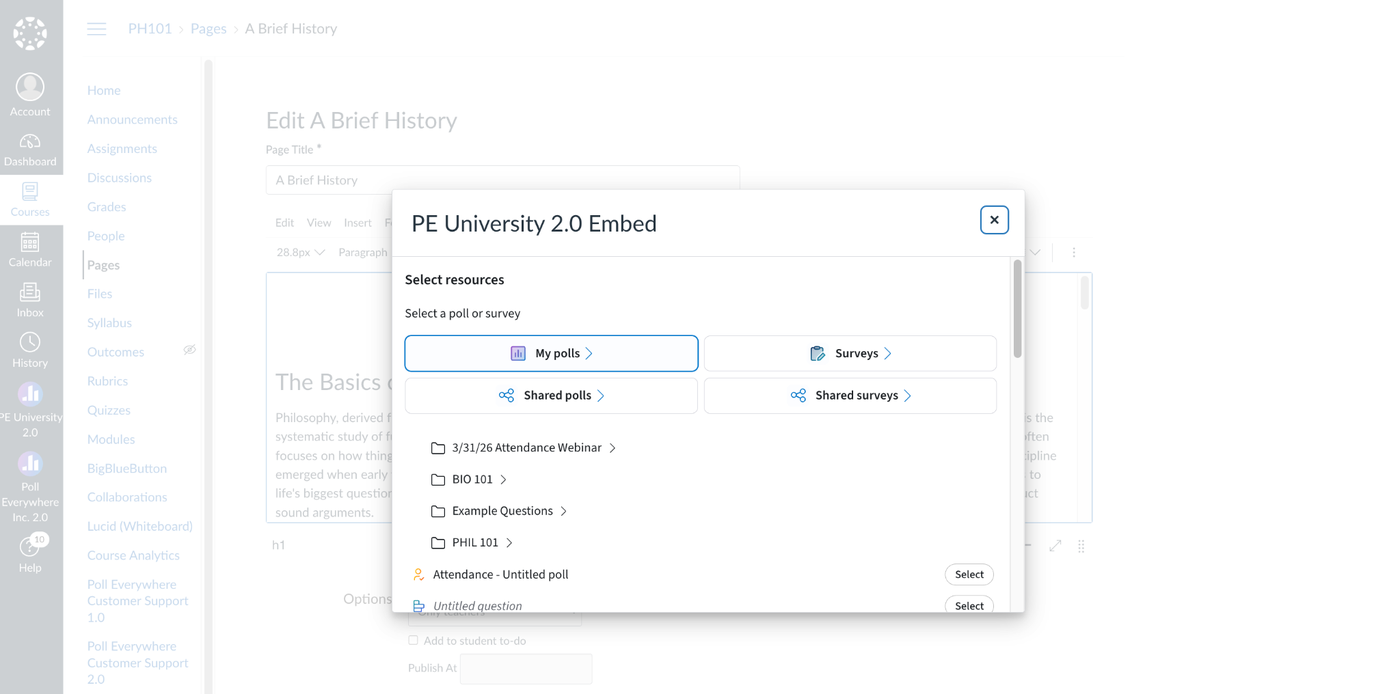
The activity is embedded on the page, and students can respond without leaving Canvas. You can place Poll Everywhere content anywhere the Embed tool is available in Canvas.